Tuesday, July 17, 2012
Day 8
So today I made what I think is a really cute, masculine card. Is there such a thing? There were lots of examples for today's cards - using labels stamps. I actually cut the whole inside out of this stamp. It was some kind of camp list - not ever going to use it that way, I don't think, and besides I kept the inside so I could use it it I wanted to! I loved the card that opened where the label was (Lisa Spangler who works for Hero Arts and is one of my fav designers), but I didn't want to copy it. Then it hit me! I didn't have any stamps to say what I wanted to say, but I knew I had little letter stickers. Somewhere along the way, someone was using those cutterbee tweezers and I just had to have them! I could not have placed all those letters without them! They are like having an extra pair of hands! I used them to knot my twine also.
There is a little piece of washi tape making a tab to open the little door. The greeting is on dimensionals and of course, no male card would be complete without a button!
Did you guess what was inside the little door? Now don't you think its the cutest?!!!!!!! You are looking at the entire card. There is no "inside". It wasn't even hard to cut the opening since I had the stamp to guide where to cut. Thanks for your support! It means so much to me to get your feedback. At least I know I am going the right way down the path!!! Hugs to you all, Barb F
Monday, July 16, 2012
Day 7 back on track
Today we did flowers. Jennifer did a wonderful background made from burnishing glitter onto the card and then she colored her image. I didn't have the exact supplies and wanted to try it anyhow. Needless to say, I didn't like how it came out. The glitter should have been very light, like close to white and mine wasn't and also it doesn't burnish well using glue to hold it as you have to wait until it dries and then nothing comes off. Oh well, I learned what not to do!! I colored this one with copics and the stamp comes from Gina K. I don't know where my "words" come from but I do know they were from 2 different stamp sets. I made the blue paper by spraying a mix of broken china distress reinker and water. Then I stamped over it using tumbled glass distress ink and stamp I colored. Pretty isn't it? (By the way, for all the Tim Holtz lovers out there who have an Apple device - THERE IS A TIM HOLTZ AP!!!!! And its free!!) The edge which is black is actually a new die (for me) that is part of a gear collection. I cut a larger circle for my card and I cut a larger black circle so I wouldn't have a hole on the back when you swivel the card. And of course stickles! I thought it needed a little more, so I did the dashed lines. I didn't want it to be the first thing you noticed, so I used a regular black pen. There is a difference in the amount of black. So here is the inside
The swivel part is made just by using a brad. I cut the inside circle to match the outside one and matched them up and punched the hole for the brad through both of them at the same time. And for those of you who want to know, here are the copics I used: YG67, YG13, YR68, YR04, Y17, Y15, E15. I wanted to make so many more cards today from the lesson. I spent lots of time experimenting with that glitter. Enough that next time I go out, I am buying some fine, light colored glitter and also that paper that has adhesive on both sides and is much bigger than the 1/4" tape I have which is why I tried so many of the glues I own!! I have a couple of projects that I am working on and will post them once I finish. Hope you are enjoying the cards half as much as I am making them!!! Hugs to you all, until tomorrow. Barb F
Just wanted to add this photo of my new toy!! I got a Vagabond and here it is with some of the other Tim Holtz things - didn't want it to feel lonely!! Am calling him Eddie!!!!
The swivel part is made just by using a brad. I cut the inside circle to match the outside one and matched them up and punched the hole for the brad through both of them at the same time. And for those of you who want to know, here are the copics I used: YG67, YG13, YR68, YR04, Y17, Y15, E15. I wanted to make so many more cards today from the lesson. I spent lots of time experimenting with that glitter. Enough that next time I go out, I am buying some fine, light colored glitter and also that paper that has adhesive on both sides and is much bigger than the 1/4" tape I have which is why I tried so many of the glues I own!! I have a couple of projects that I am working on and will post them once I finish. Hope you are enjoying the cards half as much as I am making them!!! Hugs to you all, until tomorrow. Barb F
Just wanted to add this photo of my new toy!! I got a Vagabond and here it is with some of the other Tim Holtz things - didn't want it to feel lonely!! Am calling him Eddie!!!!
Sunday, July 15, 2012
Day 6 inside
Now you can see the actual stamp I used. Did you know it was a tree? I thought the greeting was appropriate to the butterflies. It was interesting doing this one. Wish the colors had come out better. I appreciate all the support you give me when I am taking a class. It makes me want to try extra hard not to copy what our teachers do exactly. This class is so packed with stuff, there is no way I could make so many cards in such a short time. I am getting much more knowledgeable though and most of them are coming easier - this one was a major challenge and I am not sure it was worth all the time it took!!Hugs to you all, here's hoping I get tomorrow's card posted tomorrow!! Barb F
Day 6 -bonus day
This one is the culprit that took me forever to make. I had an idea that I dreamt of all night. It is really an unusual kind of card. That fancy circle is a cut out on the front of the card with that cut out being glued to the inside of the card. I stamped it in green ink and then dried it and colored the rest in copics. You didn't really think I could do this many cards in one day and not color, did you?!!There are 3 Martha Stewart little butterflies from a punch and I cut them out of dp that was a mottled green. The rest of the front is embossed through my cuttlebug. I used some distress ink slightly on the front as the card is white. I wasn't happy with the way it looked, so I took my copics and did the stems. Better. But then when I added the stickles, I finally liked it. I need to add the inside but for some reason blogger won't let me so I will do another post! Hugs, Barb F
Day 5
This card has a lot going on. The front top couple of inches are cut off and I used that same alphabet stamp to add all the "up"s. It's pretty obvious that there is some kind of balloon on the inside.
I stamped the balloon image and paper pieced the colored balloons. The black ones are stickled! I cut little strips of patterened paper to edge the center piece and it still looked lost in the background paper, so I ran a line of black stickles and then it looked right to me. I originally was going to cut apart the greeting and stamp the ups on the front that way, but the letters were just too close - look at how the p's overlap into the second row a little. I love that background with the center covered. It has clouds and stuff. This one took a bit as I had to stamp each letter separately onn the front. I loved the cut front though. Hugs, Barb F
day 4
This one is white heat embossed vellum and I glued it to a dp. Nice easy card which considering the next two and how long they took me, I needed a couple of easy cards. Hugs, Barb F
First of 4
These are going to be quick as there are 4 classes I need to post for. Each card needs a separate posting as its the only way I know how to do this. This card was made with an alphabet stamp set. It was a quick one and I just added a few gems to make it sparkle. It is done on Kraft. I apologize for the photos for all of these as its night and the light is screwy in my "sewing" room. Let me know which ones you like. Hugs, Barb F
Tuesday, July 10, 2012
Class Day 2
There is so much to tell you about this card, I decided to show it to you first -in case you just wanted to see it. I finally got this stamp and I just could NOT cut it apart so I did my own take on all the things in today's class. I did attempt the things that I had never tried or didn't know how. The first thing was heat embossing which as you know I do know how but heck, you have to start somewhere. I offset and stamped again, giving me two more butterflies. I do have a bazillion butterfly stamps but wanted to use this as its brand new to me. Then the coloring with distress inks, but masking them off. I decided that I was going to do a rainbow effect and I cut the edge of the paper I used for a mask with an edge punch. You can see the effect on the overlaps and I thought it was pretty cool myself (my own invention?). Then I sprayed it with my own mix of perfect pearls and water and decided I wanted drops so tried the new to me technique of flipping a paintbrush full of my perfect pearls mist. I liked the effect. Never cut out anything with a craft knife. Didn't have a clue where to begin but now you are looking at my very first attempt at using one. I think the cutout came out super good. It wasn't nearly as hard as I thought. Actually it was a lot easier than using the paper cutter to cut out an opening. I don't have a die for this and didn't want to use my cricut although I can. So now, I know how to use a craft knife. And the greeting is done on vellum which I have never used for crafting before. It is heat embossed and now also since I can successfully use the craft knife, I actually could cut apart my gems and not have to glue them down!! The glue that is holding the greeting is under the gems! I really like this one. Lots of new things for me all rolled into one card!! Looking forward to what tomorrow is going to bring. I don't have all those errands to do so maybe I can make more than one card!! Hugs to you all, Barb F
One of two posts for today!!
Yep!! That's right - I finished not only that one card but another. These two have something in common. They are from the same stamp! I needed to post this so I could enter a drawing. But I have yet to even view my class. Have a million super important errands to run before I can even check out the class for today - that's the super part of doing it online. It's pretty much at your convenience, but if you want in on the prizes (this one gives prizes!), you have to stick pretty close to the dates - notice I didn't say time. So here is my take on two. The pinky one is colored in with copics (of course) and stickles (of course, again!). That greeting is from a brand new to me Hero arts stamp/die set and is heat embossed. I also punched an edge in a herringbone paper to give it some interest. The other card uses the diy stamp pad I made for the first card (yesterday) and is called offset stamping - cool, huh? I think the tiny bird adds a bit to the card and that sentiment comes from a new inchie type stamp set. I had to have it!Don't forget to look in this evening (I am on Eastern time).
These went together much quicker than the first one. Guess I was trying to do too much? Hugs to you all, Barb F
Monday, July 9, 2012
Stretch your stamps Day 1
Well folks, I am taking another online card class called Stretch Your Stamps. These kinds of cards are very difficult for me which is why I keep taking classes! I am just fine coloring images but you know, I don't always have time and would like to get halfway proficient at this type of card. Right now they take me twice as long as coloring!! I know, what a joke! But its true. We did some incredible things today and I am in process of making more cards, I only finished one and need to post it so I can be eligible for prizes!!!! This one was done with a rainbow type of stamp pad made from Tim Holtz's cut and dry foam. I don't have many background stamps so I just used this one and kept stamping until it ran out of ink (I only inked it one time). I am looking at it and you really can't see the shadow stamping. Oh well.
I loved the way the stamping came out but was at a loss what to do with it. Made that felt rose from TH's pinecone die when my daughter was visiting and figured it would fit nicely. The tiny flowers are raised stickers that I have had forever so I decided to use them. I kept thinking Easter and it kind of does look like an Easter card! That's the main reason you don't see a greeting - if its still here next Easter, its going to find a home away from mine!! Hope you like it. The other one is in process - I am waiting for the stickles to dry so I can put it together. It is a really unique take on what to do with a background stamp. Hugs to you all, Barb F
Thursday, July 5, 2012
1st July birthday
Now, you know, I have lots of kids/grandkids, etc and July is a three birthday card month. This is the first one. I have this paper pack that is 12 x 12 and I just adore it - one of those I tore apart when I got it way back when. It is lots of butterflies and just so pretty. I haven't been able to make myself use it until now! The paper is just too pretty so I decided to really showcase it and picked out my favorite two sheets. The one I liked best is the one that I fussy cut and laid raised in front of Tilda - yep, if its going to be my fav paper, its going to be my fav Tilda!! Now if you are actually reading this, you already know which Tilda this is and if you don't - well, here's the photo
Happy Birthday is white heat embossed. I used an edge punch on the red paper which had butterfly stuff that I just couldn't use. I don't usually use black cardstock either, but it just was perfect for this card. The only stickles on this whole card are on the little cut out butterflies. I put gems on the bodies of the fussy cut butterflies on the front of the card and also on Tilda's bow. I was going to spray Tilda's background but decided I liked it white. So I just edged it with distress. The copics I used are: E21, E18, E33, E35, E00, E11, BG72, BG09, G82, G21, R17, R14, R11, Y15, Y17, C0, C2.
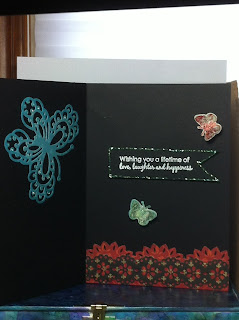
This is the entire inside of the card. I cut a black dp with a double sided Martha Stewart punch and glued it over the red edge punched piece that I also used on the front. The greeting is raised on a flag kind of piece and white heat embossed. I stickled the edges so it would be noticeable that it is raised. The little butterflies are from a Hero arts set that has stamps and dies that coordinate together. I have been really checking out my cricut lately and find that I could do pretty much the same things on it . I accidentally found out something grand! I was making a scrapbook page for the two babies we added to the family in April and May and the paper I wanted to cut kept coming up off my mat. I really didn't feel like cleaning the mat and I really didn't want to bust a new one out for one little embellishment either, so I just grabbed one of those temporary adhesive tape runners. Worked like a charm and the "glue" easily rubbed off the back of the paper. You know how sometimes when you pull paper up from the mat, it curls? Well, this pulled up so easily and it did really hold it down as it was a pretty fancy cut. I plan on using that method again - will let you know if anything different results! Right now I am thrilled.
I am going to have some different things coming up besides birthday cards. My grandson is getting married in August and I want to make them an album for snapshots taken at the wedding. And I am in another tag swap - actually it is really not . Ok, you make 12 tags and send them in and this wonderful gal is putting them together into a picture- one for each person in the group. Its the yahoo group All Things Tim. I am really in love with this group. Wish I could mix up my Tilda into the group, but I am not quite sure. Now that's what I need - a steampunk Tilda and Edwin!! Hmm.. I will have to think about this one. Wish I could draw! Hope you like my card. Lots of hugs go to all of you!! Barb F
Tuesday, June 19, 2012
Promised Tags
Today is my "baby"s birthday - He is 39!! And today is also a pretty busy day for me even though my son is on the other side of the states! I am taking the time to post these for you as I know the next days are going to be crazy busy. My older daughter was visiting me and we "scrapped" some while she was here. Had such a good time!!! It was the first time she made tags, so I thought I would post hers also. It's such a rush seeing something you made online for the first (etc) time!! She wasn't real thrilled with them and kept adding stuff (like her Mother told her to). Two of them are on shiny paper which accounts for the not so great photos, but we both love houses and I had just gotten these darlings in the mail. They are from Claudine Helmuth and clear stamps. Here are the ones with shiny paper.
She wasn't thrilled with the stamping on this one and I told her to keep it as she might use parts of it for something else. The colors are just wonderful, don't you think? The background is distress ink done with an ink blending tool.
I lightened this up a bit so you could see the colors, but it is not shiny. It was such a fun time to do this with my daughter who is a grandma herself!!
I signed up for a patriotic card swap on my yahoo group All Things Tim. Because I am never sure I will be able to finish stuff, I make sure I have done them before I sign up so all I have to do it get to the post office and mail things! I really thought of a million more things I could have added to my tags after I sent them. Maybe next time, I will hold onto them for a couple of days before I send them out!!
So here are my tags:
Saturday, June 16, 2012
Here we go!
This is the birthday card for my younger son. I can't believe how old he is!! My baby!! I had such a good time doing this one. I have to apologize for not posting the copics as I completely lost the little paper with my notes. Most of this is from one or the other of the simonsaysstamp.com kit of the month. The banners are hand cut from a stamp set and then of course stickled! That little cloud is also from one of the kits. I fell in love with the paper in the background and really wanted to keep it as a scene. The roads are just cut from a patterned paper and the lines hand drawn. The image is Kenny K and is digital - not something I do a lot of but I love his stuff. They are hard for me to color since I am not crazy familiar with the parts of the vehicles he draws!! There are lots of stickles on the card but I don't think they are too much? I did have the card without any except for his glasses, but I just couldn't get past the plainness.
You really can't see through the cloud with the silver lining, but it is acetate and shiny. I just had to use the "banner" paper so I squeezed a little in with the rest of the scene from the front. I just adore this little bear stamp even though he is kind of hard to color. I found that the stickles on his balloons needed to be quite thin or you couldn't read the letters. That white pen is a pentel. It is a lot whiter and writes much more consistently than the uniball. So hope you enjoy this as I hope he does - its in the mail!! And the next post I have coming is tags and 6 of them!!!! Hugs to you all, Barb F
Wednesday, June 6, 2012
Anniversary finish
Wow that was such a nice response from everyone! My head is getting big!! I figured you would all like to see the other half of my anniversary card. I guess it really is a mini book?
This is Murphy our cat! I only have a few stamps with a cat and this one looks so much like her that I just had to use it. The stars are a border sticker. The nameplate is a chipboard painted with Tim Holtz copper paint dauber. The letters are from tiny type stickers. That solid orange is the backside of one of the papers. I tried to put the important images all on that light blue paper. It actually has travel images on it. This is actually the very center of the "book".
Now I have some other news! I signed up for a free online class which started today. It's called "Got Glue" and here is the link
Tami showed three techniques for changing around the background and I just had a blast doing them!! It was a really neat class and you just can't beat the price!! Free!!!!
And with that I will say hugs to you all!! You make my days much brighter with your lovely comments!! Barb F
Tuesday, June 5, 2012
Anniversary Gift - part one
- Before I get too far into this, I would like to tell you that this is a two parter. I wanted to make a card that would really mean something to my husband and this one took me a couple of days to make. You know how much thinking goes into things, so none of you will be surprised to hear that it took me so long. I chose the papers first - actually this was a pack of papers coordinated to go together - all about travel. That is my theme - travel by car, plane and train. Notice no boat? We haven't done that one yet. Then once the paper was chosen, I decided after much looking and chosing, to use Edwin and Tilda and their car. Then I picked a stamp for my cat, Murphy. The copics I used are: YR07, R02, R29, R20, B00, B02, YG23, E57, E00, E11, E31, E33, E35, E37, E18, C0, C2, C3, C5, W3. I may have put more in, but that is all I wrote down. I found this video on youtube for the actual card/album. It is called "mini book tutorial" and is done by piinksharpiie. Yes, there are two ii's in both places. I really couldn't concentrate well enough on her color choices, so I just made mine in all white and covered the pages just like you do a card. If you decide to do this, cut the inside coverings quite a bit shorter - my book doesn't really close as there is just too much bulk. This is the front - I made most of the embellishments, like the globe and colored them with copics. The globe has a cute brad that says you and me. I altered the sticker to make it say enjoying since we are still married!! The with you are letter stickers. Everything is edged in Tim Holtz vintage photo distress ink. I wanted to chose one color so I didn't have to keep making decisions!! My copic was a little overfilled when I was coloring the luggage on the top and it made such a mess. I found a scrap of paper that looked ok and stamped and cut out a new suitcase so I didn't have to recolor the whole thing again! Do you see my mistake? I also replaced the name on the spare tire. There are stickles here- just little accents. Here is what you see when you open the card:
The tickets are stamped images that are just cut out. The you and me is a raised glossy sticker. And with that, I am almost to the center of the "card". I will pick this up in the next day or so and finish showing you what I made. Hope you like it, he did!! I doubt that I will put this much into a "card" again, but it was fun doing it. It was difficult to come up with things to cover so many surfaces. I had thought about it for days before I began. Hugs to you all, and know I really appreciate your comments!! Barb F
Monday, May 21, 2012
First is last
Actually this birthday was the first one in May, but my "policy" is not to post until after I give the card. I do have another to make and that's my own anniversary card. So here is the card:
The copics I used are" RV10, RV13, C2, B00, R20, E00, E11, E31, E35, E37, E18, E21, E25, E29, RV02, RV04, YG13, YG17. I have been dying to use that cute "meow" ribbon and somehow this seemed the place. The butterflies are from the Hero Arts combo set (stamps and dies) That pretty light pink flower came from a Simon Says Stamp monthly kit. I hand delivered this card so I could do pretty much whatever suited me! I thought Tilda's pants came out rather interesting to say the least! This image is from a kit exchange about 2 years ago from the Magnoliaicious (not so sure I spelled that right) yahoo group. I used some of the items in one of those exchange kits. Wasn't too sure of the paper I was coloring on so I didn't want to use too much ink. I sure hope the ones I sent inspired whoever got them to use them. I just wasn't very good at making use of things someone else had picked out for me. When I looked at the kits not too long ago, I decided that they were just so nice I had to use at least some of them. As I colored this Tilda, I really enjoyed it. Think I might just have to add her to my ever growing collection! Here is the inside:
That is a border sticker over the ends of the front ribbon. I loved this pattern paper and figured I could showcase it on the inside. What do you think?
And you will never guess what I have been up to. I actually cleaned out my "sewing" room! Took me 4 days!!! I am getting rid of anything I am not or will not be using. I guess I have enough stuff to see me through the rest of my life!!! I still have a lot of needlework left and of course my papercrafts but have eliminated all my quilting stuff. I do still have a lot of sewing stuff but not nearly any next to what I had!! So now I can actually vacuum the floor and move my chair!! I am going to put a filing cabinet in a corner as I love storing my stamps that way. I am hoping that I can fit the 12 x 12 plastic containers that I keep the wooden stamps in the drawers. That would give me that much more "clean" area. But if not, I will find another way. Probably my next post will have a lot of cricut stuff on it as I haven't played with my new art philosophy cartridge yet - I had made myself a promise to clean out my stuff before doing anything else. It's way too hard to do that if you are in the middle of something. Guess that is what I love about card making - you finish them!!! Hugs to you all, Barb F
Monday, May 14, 2012
Happy Birthday Guy
I picked out a bunch of papers and then matched up my copics. I wanted to use a bunch of papers and this is what I ended up with! This strawberry cupcake is from a newer stamp set - oh, my old age keeps showing up! I love this image and as you all know, I adore Edwin no matter what he is doing! That is a Tim Holtz ticket - funny story about that. I am signed up for the Simon Says Stamp kit of the month done by Kristina Werner. The tickets came with the first set and I misplaced the whole shebang set of decorative elements! Finally gave up looking for them and even made my own tickets! So of course they just turned up - just laying there!! Wonder what was on top of them that I moved! That button is from my real button stash. I never buy buttons. I have so many from saving them through the years so I always had whatever color on hand (I have 4 grown kids). I cut the shank off and thought it was just too plain and a perfect place for my stickles to land! That newsprint paper was so perfect with the baking powder ad!! It was a little difficult to get it so you could read it without destroying the entire sheet of paper. The "twine" is from that scrapbook sewing tool. I am going to get gutsy and try it real soon!!! In the meantime, all the colored twines are coming in handy! My grandson really raved over this one. It's his first Edwin card!! And here are the copics I used: E00, E11, R20, BG09, Y26, R17, YG23, E31, E35, E37, C2, E51, E57, E53. I drew in a bench for his to sit on and as you can really see, I can't draw either!! But it serves the purpose of giving him something to sit on. I usually use the other big cupcake stamp I have, but that would have looked stupid!!! Two cupcakes!! So here is the inside
I used all of the tickets that I thought appropriate that I had left thinking that I would probably lose them again in my room!!! I really like the way my insides of cards have been coming out.
And for the people who asked, I went back to youtube and found some videos for the foam pads boxes and the tower. I did work out my own dimensions in the end. I didn't keep any figures, but the next time I have to add a row, I will be sure and post the dimensions for the tower pieces. Look at my previous post about the tower for that info. Recently Tim Holtz came out with his spring colors and once I gave it half a thought I pre-ordered them. I now only have one empty box but am having a problem figuring out my ink pad storage. I have one of his tin storage boxes which I love. I saw his cargo box at the Megameet I just went to - that one just might have to be in my house!!!! I am still not sure but it does hold one heck of a lot very compactly and the chipboad is really thick. I just have so many plastic containers from changing from one method to another because I outgrew the first method. I am about to buy a file cabinet - once I figure out what I can do without on the floor space. I love storing my stamps the way I am and I just filled the container I am using!!! Seems like all I do is organize and clean up the messes!!!! I have two more May cards and then I can slow down a hair for June and pick back up in July!! Hope you enjoy this one!!! Hugs to you all, Barb F
I used all of the tickets that I thought appropriate that I had left thinking that I would probably lose them again in my room!!! I really like the way my insides of cards have been coming out.
And for the people who asked, I went back to youtube and found some videos for the foam pads boxes and the tower. I did work out my own dimensions in the end. I didn't keep any figures, but the next time I have to add a row, I will be sure and post the dimensions for the tower pieces. Look at my previous post about the tower for that info. Recently Tim Holtz came out with his spring colors and once I gave it half a thought I pre-ordered them. I now only have one empty box but am having a problem figuring out my ink pad storage. I have one of his tin storage boxes which I love. I saw his cargo box at the Megameet I just went to - that one just might have to be in my house!!!! I am still not sure but it does hold one heck of a lot very compactly and the chipboad is really thick. I just have so many plastic containers from changing from one method to another because I outgrew the first method. I am about to buy a file cabinet - once I figure out what I can do without on the floor space. I love storing my stamps the way I am and I just filled the container I am using!!! Seems like all I do is organize and clean up the messes!!!! I have two more May cards and then I can slow down a hair for June and pick back up in July!! Hope you enjoy this one!!! Hugs to you all, Barb F
Saturday, May 12, 2012
Rope 'Em
Happy Birthday to my cowboy loving friend! How perfect this Tilda is! I also had this cute little horse that I knew just had to be the object of Tilda's attention! How fortunate I was to find this great sticker (the greeting) in my stash! It has raised letters, no less! I am finding that I use Tim Holtz vintage photo distress ink for most of the card edging I do ever since I bought it. There are a few red gems and amazingly no stickles!!! Also no flowers!! I did this on a kraft background as it just fit. The copics I used are: BG10, BG13, BG15, R27, R29, E53, E57, R20, E00, E11, E31, E33, E35, E37, E29, E18, C2.
And here is the inside. I hope you will take a minute to look at my last post as it shows you how I store all my little foam pads for all my distress inkpads. It takes up very little room and is very lightweight so it moves easily. I got the opportunity this week to go to the Megameet in Novi, MI!!!! Wow was that spectacular!! I know that I will plan things differently for next year and include lots more than I could this year!!! Got me some major goodies!! So hugs to you all!! Will be posting another card real soon. Barb F
Monday, May 7, 2012
A Little Extra
I thought I would show you how I store the foam pads for my Tim Holtz distress inks. This little "tower" is two sided so you are only looking at one side. The tower is made up of tubes with each tube holding two little boxes. The tubes are just big enough to slide the little boxes in and out easily. The little boxes are made from 5 1/2" squares of paper. It is a very simple origami fold so that there is no glue to hold the box together. There is a youtube video called origami simple box done by vysokova that is very good. There is room for 40 boxes and I have 39!! The labels are printed directly from the Ranger site. I printed 2 of them so I could label the bottom front side of the ink pads. Here is a side view of the little tower.
I am not a crafty person, and I am sure that the gal I got this from on youtube (you will need to search for ink blending foam chest and it is done by paperpatti), was much neater with hers. Since I am not out to win any award and just wanted a lite weight, easy to use place to keep those little foam pads, mine is a bit wonky! I used score-tape to put the tower pieces together ( the tubes), so they are really secure and most of the time, I just pick it up from the top! The last time I added to the tower, it was up only. It was important to me to only have two boxes in each tube. That way you can read the name at a glance. I also used the ink pads direct on the labels so I would have an instant idea of color. I have them arranged by general color. The dimensions are loose - but it sure does the job and doesn't take up much room and is real easy to move. Hope you can use this for your stuff!! I bet yours will be neater than mine!! Will be posting cards real soon and quite a few. Hugs to you all, Barb F
Thursday, May 3, 2012
By the Sea
I got the idea for this card when I saw this digital stamp from Squigglefly. The stamp has the girl looking at a crab and it was perfect except for the crab. I did a search for shark stamps but didn't find what I was after. My little granddaughter loves marine life and for some reason has an infinity to sharks! (She also loves dinosaurs and whales). Well, I just used that free "Gimp" program and removed the crab, making me a new stamp without it. There is a gal whose online shop is "Make it crafty" and through her youtube tutorials, I learned how to work with digital stamps. By the way, she has some super adorable ones as well as really cool things if you are in Australia. I also learned the finer points of shading with my copics from her! So to go on with this post (you all know that I am not a professional and no one gives me anything for raving or even just mentioning them?) - I couldn't find a shark stamp, so I decided I must have something on my cricut! Out came the Gypsy and of course I found the shark! I then laid out my stamp in Microsoft Word to the size I thought I wanted and printed it. Now I could figure out the exact size and orientation of the shark! I think it came out ultra cute! I even stickled the shark to make it blend in better colorwise. Are you ready?
I used the May Kristina Werner card kit from Simon Says stamp and a few other things. The greeting of course is digital! I am not the best cutter when you have to leave some background. Tim Holtz' Tumbled glass to the rescue here!! I punched a few hearts out of glittery paper and isn't that cloud just too cute? From the kit.
The greeting on the inside is from a new set, but I am not 100% sure whose set it is. Just a different layout with scraps from the front.
I cut these all out on the cricut using the gypsy. The "Above rubies studio" has magnificent cd's for the cricut and the gypsy! Got them both and my cricut got a new life!! I took a photo of the back so you could see the back of the ticket which is made on white paper!! I wanted to show you how shiny green the dinosaur is. They make the perfect bookmarks. Just cut one and its mirror image and stick them together.
I used the May Kristina Werner card kit from Simon Says stamp and a few other things. The greeting of course is digital! I am not the best cutter when you have to leave some background. Tim Holtz' Tumbled glass to the rescue here!! I punched a few hearts out of glittery paper and isn't that cloud just too cute? From the kit.
The copics I used are: R17, R20, B93, B95, BG72, E31, E35, E18, E00, E11, V91, V95, C3. Since I signed up for the All things Tim ticket swap, I have been making tickets to go with every card!! I have one more card done, but not sending just yet and two more colored and the papers chosen. Hope you enjoy this one as I hope my granddaughter does!!! Any day now for another new grandchild!
Hugs to you all, Barb F
Subscribe to:
Posts (Atom)